
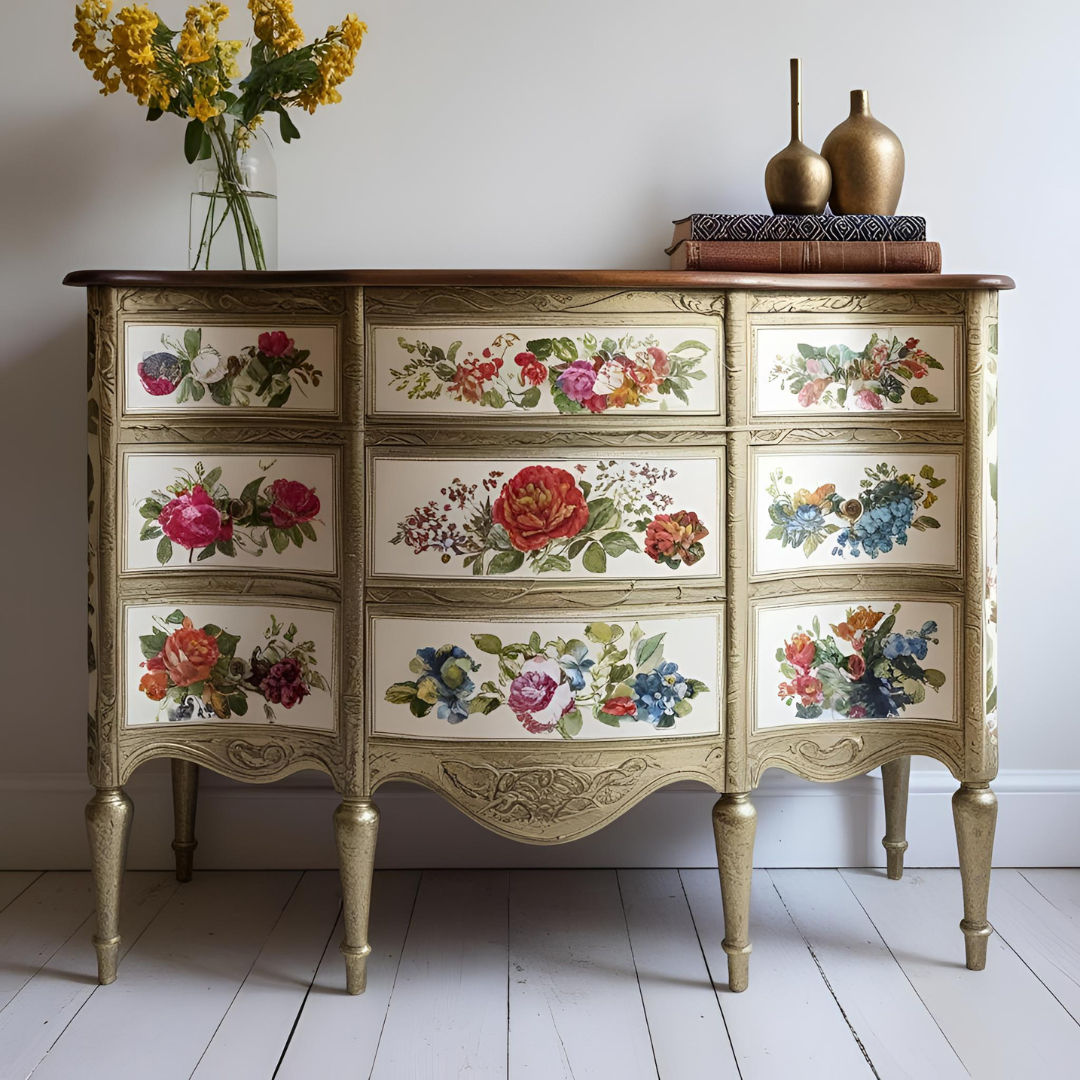

Why I Love Using Decoupage Paper for Furniture Makeovers
I started with an old dresser from a thrift store. It was scratched, dull, and sad to look at. I didn’t want to toss it out, so I gave decoupage paper a try. One sheet of paper and some glue made it shine again.
I was hooked after that first try. It cost so little, but the change was huge. I didn’t need fancy tools or skills. Just some time and a steady hand. That’s why I say it’s great for beginners.
This craft is easy and fun. You can pick from so many styles. Soft flowers, bold prints, or cool retro decoupage paper—there’s something for every piece. I love how I can match it to my mood or the room.
Even better, you can fix old flaws. Scratches? Gone. Stains? Covered. The paper hides a lot, and the end look feels fresh and new.
So if you have old furniture and want a low-cost fix, try this. It’s a fun way to bring your style into your space.
Choosing the Right Decoupage Paper for Your Furniture
Not all decoupage paper is the same. I learned that the hard way when a pretty floral design turned into a soggy mess. The right paper can make a big difference in how your project turns out. It affects both the look and the ease of working on your furniture.
What to Look for in Good Decoupage Paper
When shopping, check a few things. First, durability. Some paper is too thin and tears easily. You need paper that is strong but flexible.
Next, opacity matters. If your furniture has dark marks or old paint, go for paper that’s not too see-through. Thin paper will let the flaws show. I learned this after I tried using thin paper on a darker dresser. It didn’t hide the marks well.
Also, think about size and design. Larger sheets are best for big surfaces like tables. Smaller designs work well for smaller pieces like drawers. I always hold the paper up to the furniture first to see how the design will look.
Quick tip: Choose strong, opaque paper for a smoother finish that hides flaws.
Decor Tissue Paper vs. Thicker Papers
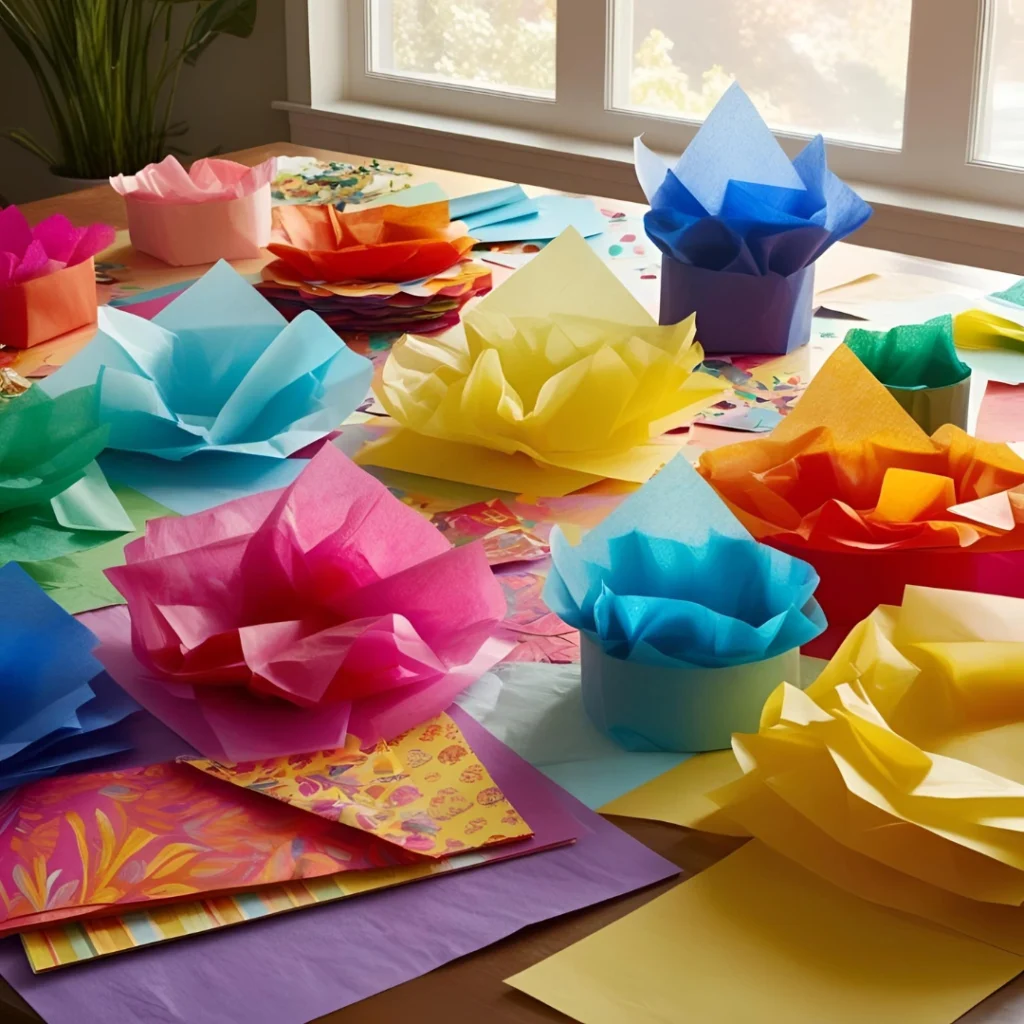
People often ask, When should I use tissue paper and when should I go for thicker decoupage paper? Here’s my tip:
- Decor tissue paper is great for rounded or detailed shapes. It’s flexible and easy to mold. I use it on things like chair legs or small planters.
- Thicker decoupage paper is better for flat surfaces. It’s easier to lay out smoothly and looks polished.
I once used thick paper on a curved cabinet door. It ended up with wrinkles everywhere. If I’d used tissue paper, I would’ve avoided the mess.
Use flexible tissue paper for curves, and thicker paper for flat surfaces to avoid wrinkles.
My Go-To Picks and Favorite Styles
Now for the fun part—shopping! My favorite place for unique designs is Etsy. But if you’re just starting out, Amazon has great bundles. When I want a bold look,
retro decoupage paper is my choice. Think 70s prints, funky florals, or pop art designs.
For softer styles, I turn to decor tissue paper. It’s perfect for farmhouse-style or shabby chic furniture. I choose the style based on the room—it’s like picking an outfit for your furniture!
For bold looks, go for retro designs. For a calm feel, choose soft prints with decor tissue paper.
Step-by-Step: How to Decoupage Furniture Like a Pro
Want to makeover old furniture with just paper and glue? Here’s how I do it—no fancy tools needed. Just real tips from trial, error, and a few sticky fingers.
Supplies You’ll Need
Let’s start with what you’ll need. I like to keep it simple.
- Decoupage paper (decor tissue paper or retro designs—your choice)
- Mod Podge or furniture-safe decoupage glue
- A foam brush or soft bristle brush
- Scissors
- Sandpaper (medium and fine grit)
- A soft cloth
- A sealer (polycrylic is my go-to)
Quick tip: A foam brush gives smooth results without streaks.
Surface Prep: Clean, Sand, Prime
Here’s where I messed up the first time—skipping the prep.
Clean your piece well. Dust, oils, or sticky spots will ruin the finish.
Then give it a light sanding. I use medium grit to start, then go over it again with fine grit.
If the surface is dark or uneven, apply a white or light primer coat. It helps the paper colors pop.
Answer first: Yes, prepping the surface helps the paper stick better and look smoother.
Applying the Decoupage Paper
This part is fun but a bit tricky—like wallpapering, but smaller.
Brush on a thin layer of glue where you’ll place the paper.
Carefully lay the paper down. Start at one edge and smooth it out with your fingers or a dry brush.
If it bubbles—don’t panic! I lift it gently and re-smooth.
Work in sections. Don’t rush.
Snippet-ready: To avoid wrinkles, apply glue in small sections and smooth gently as you go.
Sealing for Durability and Shine
Once dry (usually takes a few hours), it’s time to seal.
Brush on a thin layer of sealer over the whole surface. I like matte or satin finishes—glossy can look too shiny on older pieces.
Let it dry completely, then add another coat if needed.
Tip: Always seal your furniture to protect the design and add durability.
Mistakes I Made (And How to Avoid Them!)
I’ve had my share of flops. Here’s what went wrong—and how I fixed it.
Problem: Paper was too small or didn’t line up
I once cut my paper too early. It didn’t fit right, and I had gaps.
Solution: Always hold the paper to the furniture before cutting. Give extra room, then trim after.
Problem: Bubbles and wrinkles ruined the look
I used too much glue and rushed the smoothing. Not pretty.
Solution: Use less glue, apply slowly, and smooth with clean fingers or a soft cloth.
Problem: The finish looked cloudy
I used a sealer that reacted with my glue. Total letdown.
Solution: Always test sealer on a scrap piece first. Polycrylic works well with Mod Podge.
Problem: The color didn’t pop on dark wood
My retro decoupage paper looked dull on a black cabinet.
Solution: Use a light primer coat. It makes colors brighter and hides dark stains.
Decoupaging furniture isn’t just a craft—it’s a joy. And the best part? Even the mistakes teach you something new. So grab some paper and start creating. It’s easier than you think.
Where to Buy Decoupage Paper in the USA
Looking for decoupage paper? You’re in the right place! Whether you’re fixing up old furniture or starting a new craft, you need the right paper. Here are the best places to buy it online and in stores.
Best Places to Shop Online
Amazon
- Amazon has lots of choices. You’ll find small and large sheets. Some are made just for furniture. Try brands like The Shabby Hummingbird. They offer fun prints like “Radiant Roses” and “Sassy Sea Turtle.”
- Etsy
Want something unique? Try Etsy. Many sellers offer handmade or vintage-style designs. You can even ask for custom prints.
- Maika Daughters
Maika Daughters sells pretty papers like “Sandrina A3” for $6.29. Their styles work great for many projects.
- Dixie Belle Paint Company
They sell paint and paper. Look for fun prints like “Watercolor Poppy” or “Vintage Oranges.” Each sheet is $7.95.
- DecoupageNapkins.com
This shop has papers from Europe. They offer floral, vintage, and holiday styles. The papers are soft but strong.
- Painting Lady Designs
Doing a big piece? They sell large sheets—24×36 inches! Great for furniture or wall art.
Online vs. Local Stores
- Online
Big selection
Easy to shop anytime
Can’t touch before you buy
May have to wait for shipping
- Local Craft Stores
Get it right away
See the paper before buying
Fewer styles to choose from
Want Something Special?
Try shops like Milton’s Daughter or Decoupage Queen. They sell rare or vintage papers. On Etsy, you can also find one-of-a-kind designs made by small shops.
Final Tip
Pick papers that match your style and project size. With so many shops out there, you’ll find just what you need!
Creative Ideas and Project Inspiration
Need fresh ideas for your next furniture flip? Let me share a few favorites that worked wonders for me—and a few gems from the DIY community that blew me away.
Dressers, side tables, cabinets—even planters—I’ve decoupaged them all. One of my favorite projects? A plain, beat-up nightstand I grabbed from a yard sale. It was sad and scuffed, but I saw potential. I used a bold retro decoupage paper with mustard yellows and 70s swirls. Instantly, that little piece had attitude. Now it sits proudly by my bed, holding books and compliments from guests.
Quick Idea: Use bold prints for small pieces like nightstands. They’re perfect for testing out fun patterns without overwhelming a space.
Side tables are another easy win. I once used decor tissue paper with soft botanicals on a two-tier side table. It now lives in my sunroom with a plant on top—and yes, it makes me smile every morning. Tissue paper is flexible, so it worked perfectly on the curved legs.
Snippet-ready: Tissue paper is ideal for curved or awkward furniture pieces because it molds easily without tearing.
Cabinets and drawers? Go wild! I’ve seen people line drawer faces or even the insides with vintage decoupage paper for a secret pop of color. It’s like giving your furniture a hidden personality.
Try This: Line the inside of drawers with floral or retro paper. It’s like a surprise every time you open it.
And don’t forget smaller things like planters or trays. I once wrapped a terracotta planter in citrus-themed paper and sealed it with outdoor Mod Podge. It’s still on my porch—cheerful as ever, rain or shine.
Fast tip: Use outdoor sealer for anything that lives outside or near water (like planters or bathroom trays).
Now, I’m not the only one having fun with this. I’ve had readers send photos of amazing projects—like a mid-century modern dresser covered in geometric decoupage paper, or a soft gray vanity with rose-themed tissue paper. The creativity out there is endless, and honestly, it inspires me to keep going.
So if you’re stuck, start small. A drawer. A tray. Even a lampshade! Just pick a paper you love and go from there. Before you know it, you’ll be looking around your house wondering, “What else can I decoupage?”
Tips from Experience: What I Wish I Knew Before Starting
Oh boy—if I could go back and talk to my beginner self, I’d have a lot to say. When I first started decoupaging furniture, I made all the classic mistakes. Too much glue, not enough prep, and don’t even get me started on trimming paper too early. Here’s what I’ve learned the hard way—so you don’t have to.
Sizing and Trimming: Don’t Cut Too Soon
The biggest lesson? Don’t trim your paper before laying it out. I used to measure the piece and cut the paper to match, thinking I was being smart. Spoiler alert: furniture has curves and edges that don’t always play nice.
Now I do this instead: I hold the paper up, lay it over the surface, and then trim after it’s glued and smoothed. That way, I avoid gaps or pieces that are just a hair too short. I also leave a little extra around the edges and sand it down once dry. It gives a nice clean finish.
Tip: Always cut your paper after placing it. A little extra is better than not enough!
How to Avoid Bubbles and Wrinkles
My first project looked like a crumpled map. I used too much glue and tried to smooth it all in one go—bad idea. The paper shifted, wrinkled, and bubbled like crazy.
Here’s what works now:
I brush on a thin layer of glue in small sections, then slowly press the paper down as I go. I smooth it with my fingers first, then go over it gently with a soft cloth. If a bubble pops up, I lift that part and lay it again. No big deal.
And don’t rush! Let each part dry before moving on, especially if you’re doing a large surface.
Tip: Less glue + slow smoothing = fewer bubbles.
The Best Sealers and Finishes I Swear By
Okay, let’s talk sealing. I didn’t realize how much the right sealer could make or break the final look. I once used a glossy spray that turned cloudy and sticky. Total regret.
Now, I stick with polycrylic in matte or satin. It dries clear, doesn’t yellow, and gives the paper a smooth, professional feel. I apply two light coats with a soft brush, letting it dry fully between each.
If I’m working on something that’ll sit outside or near water (like a bathroom tray), I go with outdoor Mod Podge. It’s tougher and holds up to humidity.
Tip: Always test your sealer on a scrap piece before using it on the real thing.
Looking back, I’m glad I made those mistakes—they taught me what not to do. But if I can help you skip a few of them, even better. Just remember: take your time, enjoy the process, and know that even the mess-ups make great stories.
Got a trick of your own? I’d love to hear it in the comments!
Final Thoughts: Is Decoupage Furniture Worth It? Absolutely!
If you’re thinking about giving decoupage furniture a try, let me say this: absolutely, yes! It’s one of the most rewarding DIY projects you can dive into, whether you’re a seasoned crafter or just starting out.
When I first tried it, I had no idea how big of a transformation could happen with just a little paper and some glue. The creativity you get to unleash is amazing! You can breathe new life into furniture that might otherwise end up in a landfill. It’s simple, cost-effective, and doesn’t require a lot of fancy tools or skills—just patience and a little love for the process. I’ll never forget how that first thrift store dresser looked after I finished it—like it had a whole new personality. And honestly? That feeling never gets old.
Why try decoupage furniture? For me, it’s not just about making a piece look good. It’s about the satisfaction of turning something old into something new, adding your personal touch, and really creating something unique. Plus, you can go as bold or as subtle as you like with your designs. Whether you’re into retro prints or soft florals, there’s no shortage of ways to make your furniture reflect your style.
And here’s the best part: you don’t have to be perfect! We all make mistakes—I sure did. But those mistakes have only made me better at the craft. With every project, you learn something new, and that’s what makes it so fun. You get to see your progress, and before you know it, you’re tackling more ambitious pieces with confidence.
So, if you’re still on the fence, let me encourage you: give it a go. Even if you’re a beginner, decoupaging furniture is one of those projects where you can’t go wrong. You’ll be surprised at how quickly you’ll pick up the technique and how much satisfaction it brings. And hey, even if things don’t turn out exactly as planned, you’ll have fun and have a one-of-a-kind piece of furniture at the end of it.
I’d love to hear about your own projects! Have questions or need help along the way? Drop them in the comments, and let’s chat about your decoupage adventures!


Leave Your Comment: